
Have you ever wanted to try making noodles? I have wanted to give it a try for the longest time. The only thing that kept me from it was the equipment. I couldn’t afford it at first, but now I’m unsure if I would use it enough to justify the expense and precious cabinet space. Then I ran across this Biang Biang Noodles recipe. The noodles are hand-pulled, and the only equipment I needed to buy was a $6 mini rolling pin. So yeah, I finally get to try making noodles. I’m so excited!
Biang Biang noodles are thick noodles that could double as a belt. It is said that one biang biang noodle can fill an entire rice bowl (and it’s true!). Learn how to make these surprisingly easy noodles – I promise, you’ll be as stunned as I was as to how fun and tasty they are!
The Ingredients
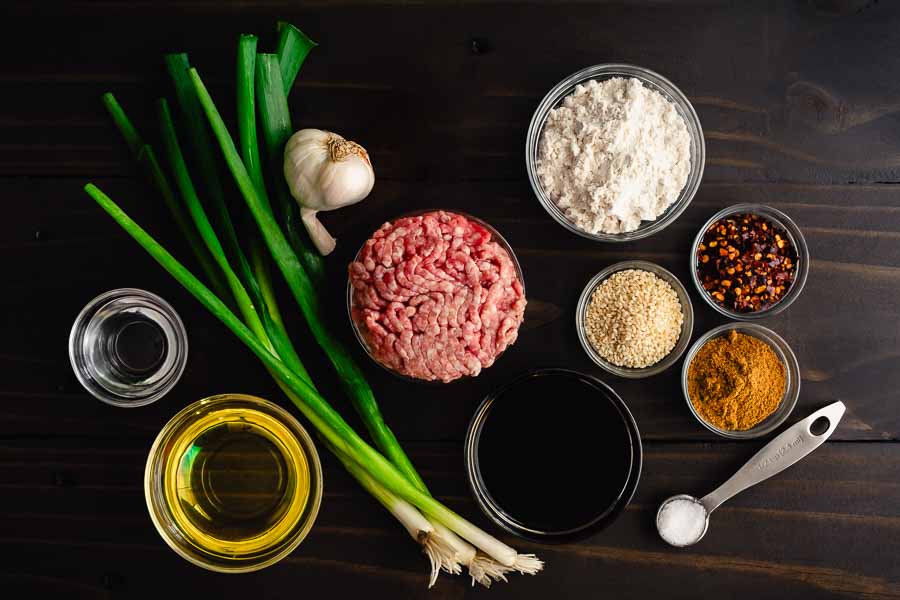
The good news about this recipe is almost all the ingredients were in my pantry. I had everything from the flour to the spices and soy sauce.
I wasn’t sure what type of vinegar to use and went for distilled white vinegar since it’s the standard. At least it is here in the U.S., but I think any type would do as it was not a prominent flavor in the finished sauce.
All I had to shop for was pork mince (ground pork), garlic, green shallots (green onions or scallions), and peanut oil. I found all of them except the peanut oil. A quick search revealed it’s a neutral oil and canola oil was the top substitute. I had that on hand, so that was one less thing I had to buy.
The Process
This recipe is for the biang biang noodles and a spicy chili sauce to top them with. I chose to add pork mince to mine, but it’s optional. Leave it out to make your biang biang noodles vegan. And spoiler: you probably won’t miss it.
Prepping the Noodles
This recipe kicks off with making the noodle dough, and it couldn’t have been easier. All I had to do was add the ingredients to the bowl of my stand mixer. I mixed them with a wooden spoon until they came together, placed the bowl in the mixer, added a dough hook, and let the machine do the kneading.
Tip: Mix the ingredients until the flour is absorbed before turning on your stand mixer. That way you don’t get the poof of flour dust at the start. Even my stand mixer’s spatter shield can’t contain the cloud of flour, and this simple step does.
Don’t have a stand mixer? You can still make this recipe! You’ll have to do the kneading by hand, but kneading isn’t difficult. The kneading time is the same, and you should have a smooth, well-mixed dough at the end.
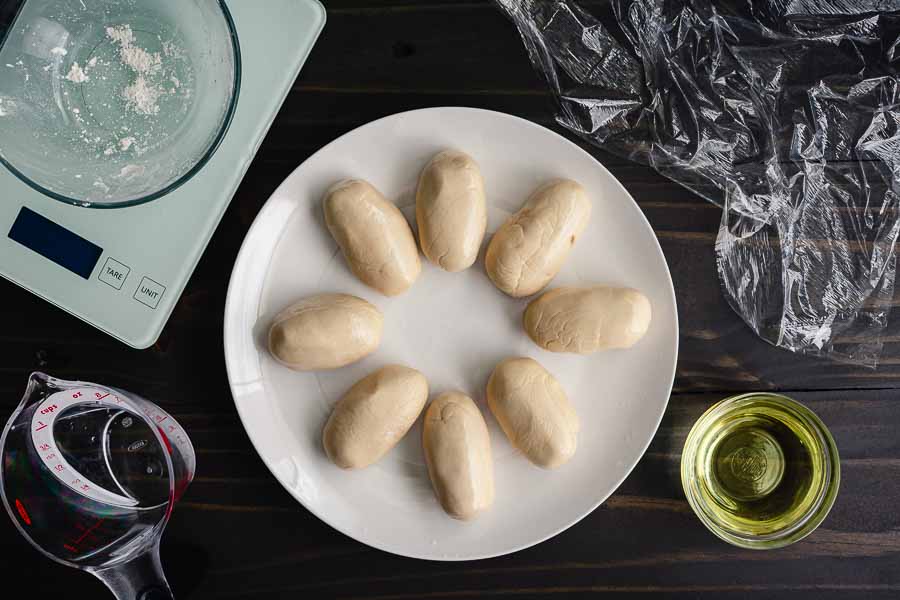
Next, I shaped the dough into a small disc and used my bench scraper to divide it into eight portions. Once the dough was portioned, I stopped to oil my hands. Then I took each section and rolled it into a small cylinder that was similar to a small cucumber or large dill pickle. Finally, I placed each piece of dough onto a plate, covered it with plastic wrap, and let it sit for three hours.
Finishing the Prep Work and Making the Sauce
I began prepping the chili oil sauce while the dough was kneading. Most of it was done by the time the kneading was finished, so I paused that and finished the dough prep work before continuing on the sauce.
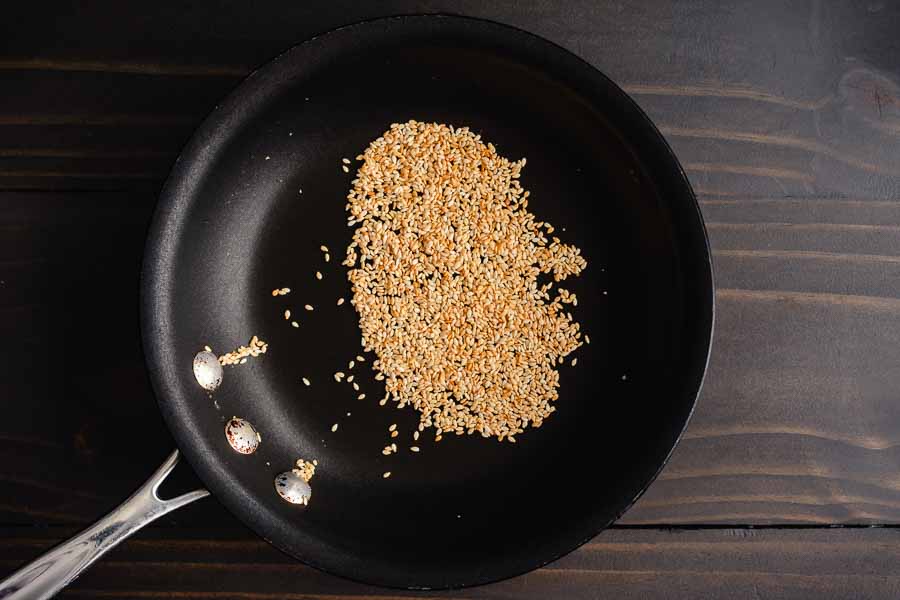
I went back to the sauce prep work once the dough was covered and relaxing. That meant a little chopping, measuring, and toasting the sesame seeds. You can buy them toasted, but the ones I had on hand were not.
Tip: To toast the sesame seeds, preheat a dry skillet on medium heat for 2-3 minutes. Add the sesame seeds and stir or toss frequently (about every 30 seconds) until they turn golden brown and fragrant, keeping a very close eye on them so they don’t burn. Once they are toasted to your liking, remove them from the pan to cool. They will continue to toast if you leave them in the hot pan even if you remove the pan from the heat and can even burn if the pan is particularly hot.
Making the Sauce
I made the sauce around 2.5 hours into the dough relaxing. It was so quick and easy to make! All I had to do was add the ingredients to a 2.5-quart saucepan and cook until the pork was done.
I added the ground pork in large pieces and broke it up with a wooden spoon as I cooked. It ended up crumbling into very small bits even though I wasn’t particularly rough. That turned out to be a good thing, though, because the small bits of pork stuck to the noodles.
Pulling and Cooking the Noodles
Now it was time to make the noodles. I won’t lie, I was nervous, but this part was as easy as the author made it look! The water was already boiling since I had put it on to boil while I made the sauce. it was bubbling by the time I was ready to make the noodles.
I made and cooked the first 2-3 noodles one at a time to make sure I had the hang of it. The post with this recipe had detailed instructions, lots of photos, and a video (as well as their fascinating history). All that made me confident I could do this, and I was right. I did the thing 😊
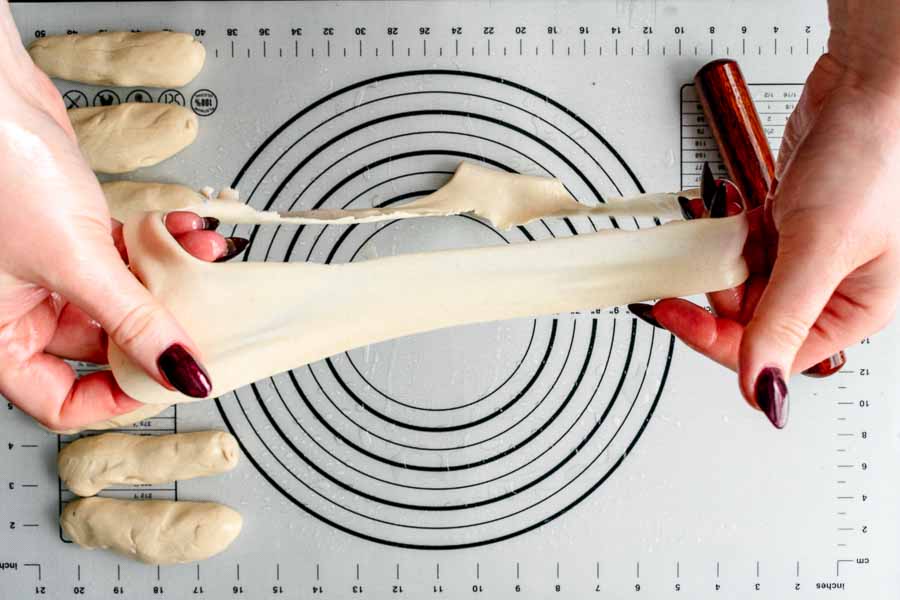
First, I rolled one section of dough flat. Then I pressed the rolling pin into the center to create a dent. Tip: Press hard to make tearing the dough neater and easier.
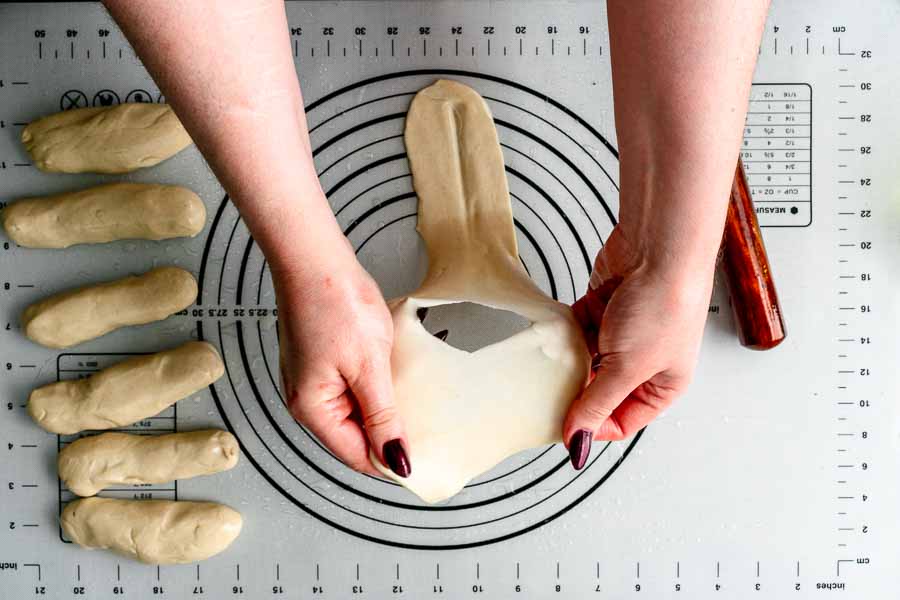
Next, I tore the dough and started pulling. I stretched short sections of the dough as thin as I could manage without it breaking. Resting the dough made it very stretchy, and I was able to get noodles that were 5-6 feet long!
When I felt the noodle couldn’t be stretched any further, I dropped it into the boiling water. I didn’t time the cooking, but it was fast! The noodle floated to the top after 60-90 seconds.
Tip: Drizzle the cooked noodles with a little oil to keep them from sticking together if they sit for more than a minute or two.
Finishing Up & Serving
I stretched the last few noodles and set the dough aside before cooking them, keeping them separate so they didn’t stick together. Then I dropped them into the water one at a time since the pot I used wasn’t very large.
I was almost done, but the sauce wasn’t quite finished. I mixed in 1/2 cup of the water from the noodle pot before topping the noodles and serving them with spring rolls and dumplings.
Timing
This recipe lists 30 minutes to prep, 3 hours to rest the dough, and 15 minutes to cook. That’s a total of 3 hours and 45 minutes, and I came close to that. Here’s how my time was spent:
- 13 minutes to prep the dough
- 3 hours to rest the dough
- 3 minutes to cook the sauce
- 19 minutes to pull and cook the noodles
- 3 hours 35 minutes total
Honestly, I expected to go way over the time listed since I have never made noodles before. I was very careful and fussed over a few steps and still came in just under the total time.