
I went shopping the other day and happened to notice a freezer full of baby back ribs. Mmmmm ribs went through my mind then and when I passed that freezer on a few subsequent trips. I Had to find a recipe for ribs! A short search later, and I found one that not only sounded good but didn’t require grilling outside. This summer’s heat has been brutal, and I’m sure my poor air conditioner will back me up on that! These Korean Gochujang Ribs can be made in the oven or slow cooker and finished in the oven or on the grill. I chose options that kept me inside, and I don’t regret it!
Korean gochujang ribs are a spicy twist on a classic favourite. So easy to make as barbecued ribs, in the oven or slow cooker.
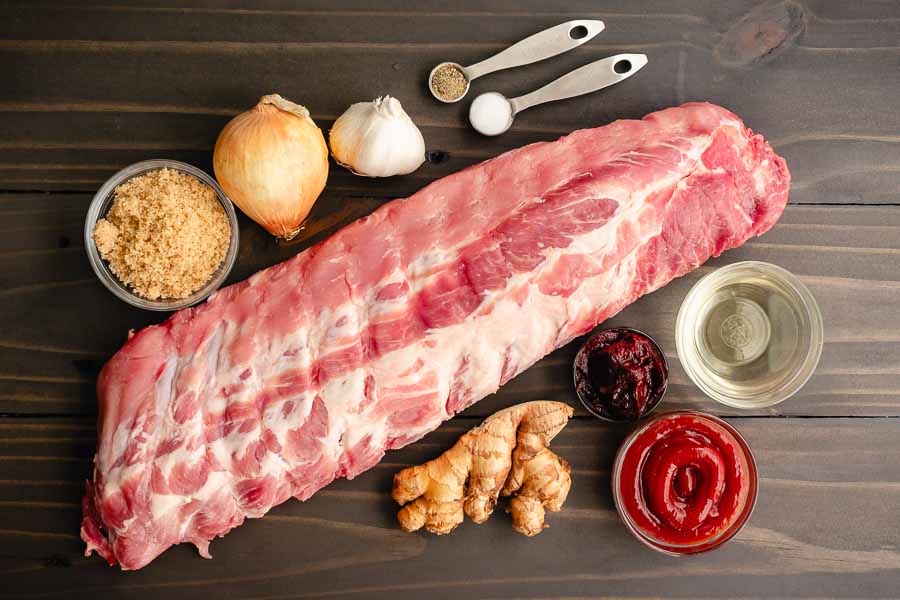
The Ingredients
I had a few things on hand like brown sugar, salt, pepper, ketchup, and gochujang paste. I used the gochujang for the first time when I made a Korean squid stir-fry, and I have kept it on hand ever since. It’s so good!
That left me to shop for the rest of the items, and they were all at my usual grocery store. I found a 3-pound rack of ribs for $22. Tip: The package was labeled “pork loin back ribs”, but that’s just another name for baby back ribs.
The Process
This recipe was written in a way that was easy to follow, for the most part. I did have a couple of minor hiccups, but nothing insurmountable.
Making the Sauce
It began with the sauce, which was such a good idea. I got the fresh items prepped and then began cooking in a medium saucepan.
Things started off with a little sauteeing and seemed to be going well. Then I noticed the ketchup from the ingredients listed wasn’t mentioned. I kept re-reading the recipe to make sure. The 1 cup of ketchup from the ingredients list just wasn’t there.
I chose to add it in Step 5 with the rice vinegar and brown sugar. It seemed to work just fine because I ended up with a nice sauce once I finished.
Preparing the Ribs
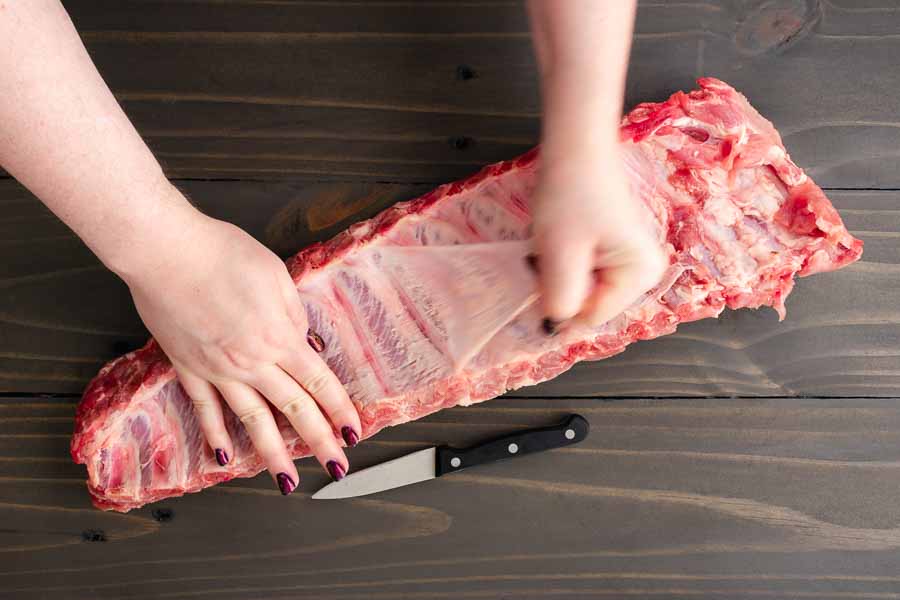
I prepped the ribs while the sauce simmered on the stove. The silverskin was still on them, but it was a little difficult to see since it was so thin. But the exposed fat on the wider end was a dead giveaway that the silverskin had been peeled away.
To remove it from the rest of the rack, I used the tip of a paring knife to lift the silverskin from the narrower end. Once I was able to get a good grip, I just peeled it off.
Cooking the Ribs
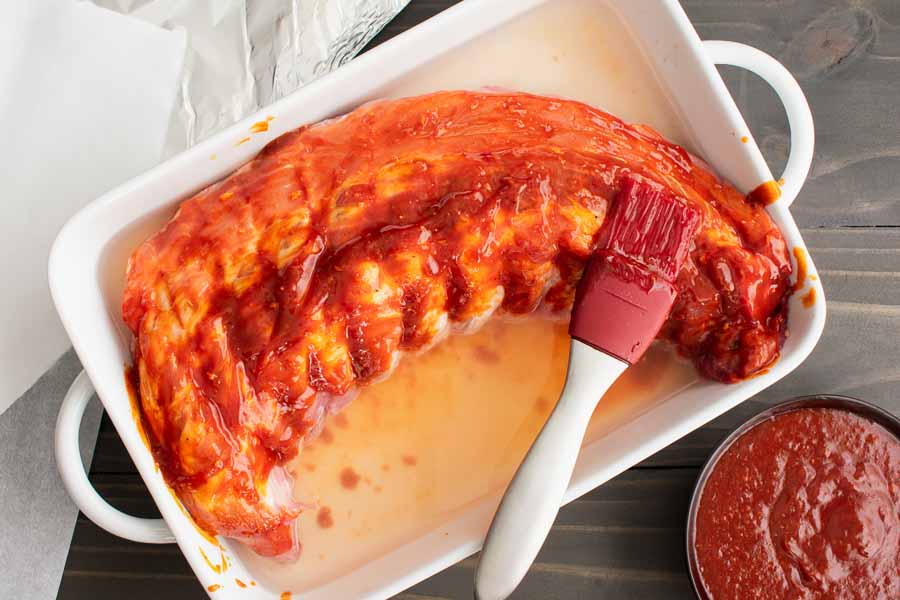
I chose to make my ribs in the oven, so I placed them into my largest casserole dish. The rack had to be squeezed in since I didn’t have a larger dish, but it all worked out.
Next, I filled the dish with enough water to come halfway up the ribs. And once the sauce was cooled and blended, I generously brushed it over the top. Finally, I put on a layer of parchment paper followed by a layer of foil before they went into the oven for 2 hours.
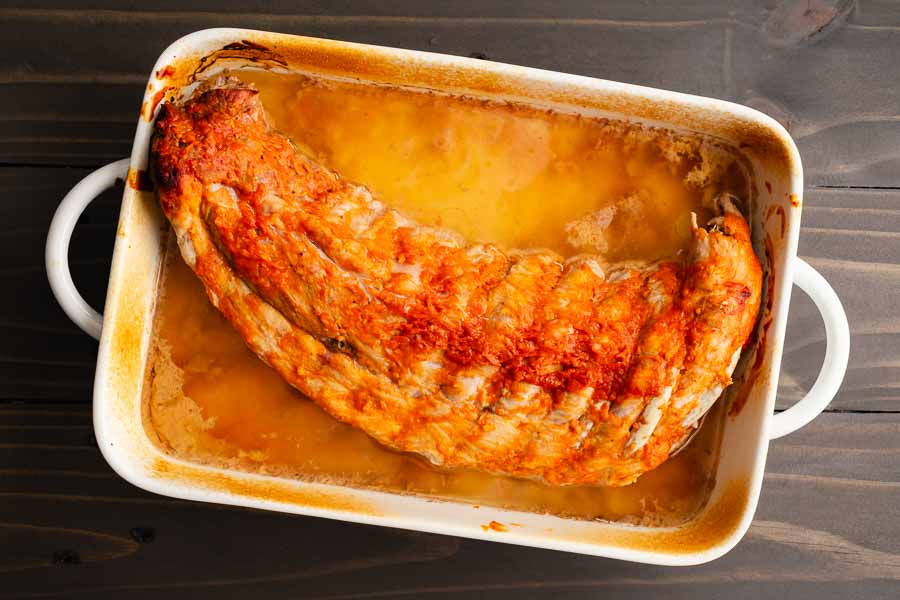
As you can see below, the ribs didn’t look too different when they came out of the oven after 2 hours. I wasn’t surprised since they had been covered and still needed to be finished. That usually crisps and/or browns.
So I turned up the heat to 425℉ and placed the ribs onto a sheet pan. Tip: I should have lined it with foil before adding the ribs, but I didn’t foresee the baked-on mess I would end up with later.
I had so much sauce left that I decided to brush on another layer before the sheet pan went into the oven. It wasn’t part of the recipe but it felt right.
The ribs came out of the oven 20 minutes later, and they weren’t much darker than when they went in. I wasn’t expecting that, and I was a little disappointed. They didn’t look like the ribs in the recipe’s picture, and, unfortunately, I forgot to snap a photo for you.
Tip: To get the rich brown color and char, I had to broil the ribs. I let the oven’s built-in broiler heat on high for 2 minutes, then I put them underneath for 2 more minutes. They got a crispy char, but the low setting would have been best. They were just a little too crispy for my taste, but that was all on me, not the recipe. The meat inside was still nice and juicy.
Timing
This recipe lists 20 minutes to prep, 2 hours to cook, and a total time of 2 hours and 20 minutes. That doesn’t seem to include the time listed to cook the sauce (20 minutes) or the time to bake the ribs on a baking sheet (18-20 minutes). If I add those, the total time is 3 hours.
I went a little over that since I chose to bake the ribs on the baking sheet for the maximum time (20 minutes) and put them under the broiler. Here’s how my time was spent:
- 17 minutes to prep the sauce
- 20 minutes to cook the sauce
- 7 minutes to blend the sauce and prep the ribs
- 2 hours to cook in the casserole dish
- 20 minutes to transfer to a baking sheet and raise the oven temperature to 425℉
- 20 minutes to cook on the baking sheet
- 2 minutes to preheat the broiler
- 2 minutes to broil the ribs
- 3 hours and 28 minutes total