
It’s National Angel Food Cake Day, and I realized two things. One: I haven’t had angel food cake in ages. It used to be a regular on Mom’s dessert menu, although she always bought it rather than making it. And two: I have never made an angel food cake. I need to change both of those things, so I had to try making this Angel Food Cake recipe. I have ordered my angel food cake pan (yes, it has its own pan), and I’m ready to get baking!
100% homemade angel food cake! This is the recipe that everyone will ask you for! This recipe shows you how to use all purpose flour instead of cake flour to make angel food cake, plus we’ve tested it multiple times and works GREAT with gluten free flour!
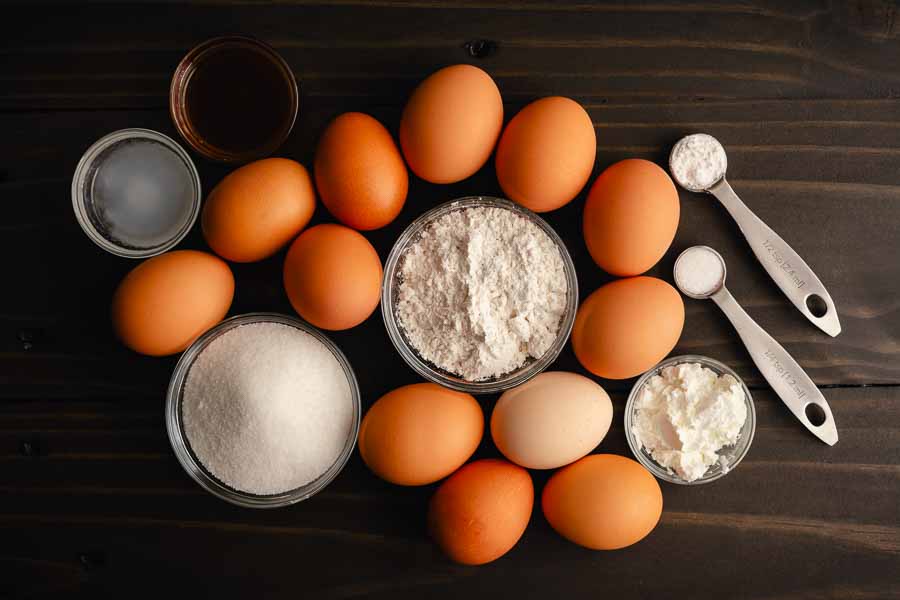
The Ingredients
As usual, I did a pre-shopping kitchen run-thorough to see what ingredients I had for this recipe. It turns out that I had a lot of them. So it was a big check for almond and vanilla extracts, granulated sugar, flour, cornstarch, salt, and cream or tartar.
That left me with a grand total of one item for my shopping list: a dozen eggs. Since this recipe requires all of them to be separated I was glad I already had some eggs in my refrigerator. If not, I would have bought another half dozen as a backup. It’s so easy to break a yolk, and they can’t be separated out to the whites if that happens.
What about buying a carton of egg whites? That isn’t mentioned in the recipe or accompanying blog post. I did see the questions asked in the comments, and the author replied that she had never tried it.
However, another reader did chime in and said she has done it that way successfully many times. It sounds like an easier option, but you won’t have leftover egg yolks to make a Twelve Egg Pound Cake. Not so subtle hint that that recipe is coming soon—I couldn’t bring myself to waste all those egg yolks!
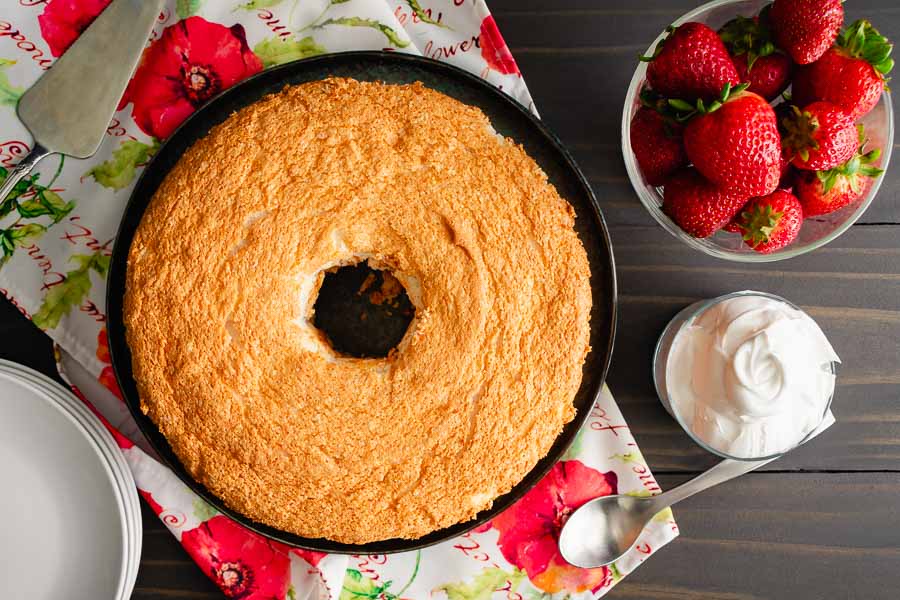
Oh, I made sure to pick up fresh strawberries and whipped cream to top my angel food cake. Fresh berries and whipped cream are my favorite toppings, though this cake is good enough to eat on its own too.
The Process
This Angel Food Cake recipe is all about two things: flour and egg whites, and they both need a lot of work. Thank goodness for modern appliances! It also requires an angel food cake pan or a bundt pan (a.k.a. tube cake pan).
The Angel Food Cake Pan
Angel food cake pans are similar to bundt pans. They have a tube in the center but additionally have short legs on the top edge and removable bottoms. These pans can also be used as bundt pans, just ignore the legs. I tested this myself, and the pan did not leak despite the removable bottom (yay!).
The legs allow air to circulate when the cake is inverted for cooling. Yes, it’s cooled upside down. Not greasing the pan lets the cake stick and not fall out while it cools this way. The removable bottom makes getting the cake out of that ungreased pan intact much easier. With a little help from a spatula.
I bought a non-stick angel food cake pan for some extra help with removal. While the capabilities of different materials vary, nonstick generally means you need much less oil, and clean-up is easier. I have seen ads for nonstick pans that claim not to need any oil, but I have never used one, and that has not been, my experience with the pans I own.
FYI, The recipe does not mention what size pan is needed, but it does have a link to a 10-inch pan that is no longer available. The pan I bought was 9.5 inches in diameter, 4 inches tall, and holds approximately 16 cups. It was a great size for this recipe and that Twelve Yolk Pound Cake I mentioned above.
What if you don’t have an angel food cake pan and just don’t want to buy another single-use pan? The author does mention using a bundt pan in the recipe post. She said she balances the center of the pan on an inverted coffee mug to allow air to circulate during cooling. The only downside is removal is probably not as easy without a removable bottom.
Sifting the Flour
Things begin with sifting the flour. I have a one-hand press or squeeze sifter. It’s fine for small amounts of sifting, but it gets tedious and downright painful for my joints for lots of sifting.
You might have a hand-cranked sifter, and I have a feeling that style is much easier to use. I might have to pick one up since they aren’t too pricey. A quick glance at Amazon shows $10 to $15 for most, with some going up to $20.
Either style does the same job, and they’re great because most have a double layer of mesh for a finer sift. But I had to work with what I had. The flour needed to be sifted 7 times, so I used another tool to save my poor hands.
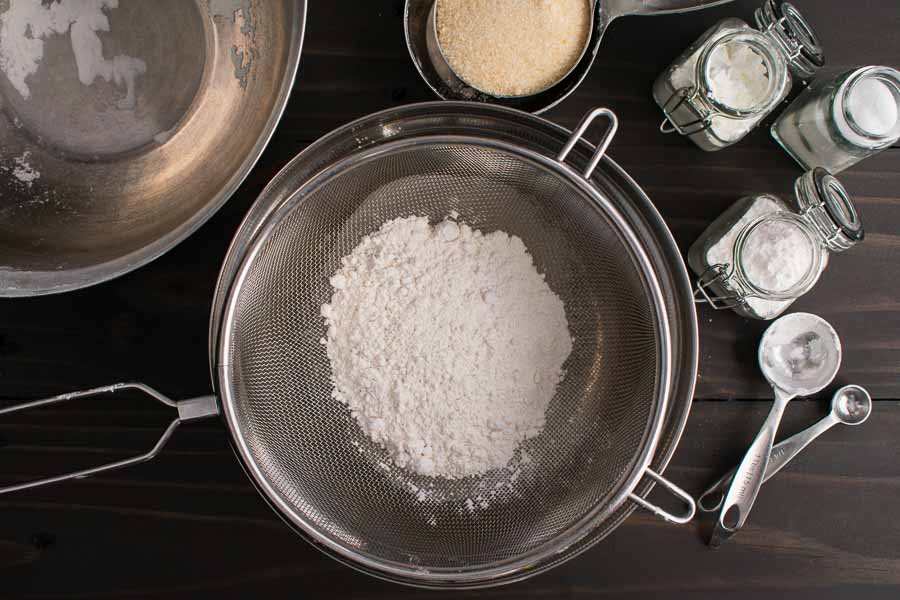
Tip: To sift the flour, I simply placed a mesh strainer (colander) over a mixing bowl and lightly shook it. It can also be stirred with a spoon if that motion isn’t comfortable for you. Either way, the sifting is much faster and easier than my old squeeze sifter.
I sifted the flour into one mixing bowl, then poured the sifted flour back into the sieve after placing it over a second mixing bowl. The sifting went back and forth between the bowls, adding other ingredients as instructed.
Finishing the Batter
Next up were the egg whites. I don’t know how I did it, but I managed to separate 12 eggs without breaking a yolk into them. Some of the yolks did break as I put them into another bowl, but I wasn’t worried about that at all.

Next, the recipe said to combine the egg whites, cream of tartar, and extracts and mix for 7 to 10 minutes. This is when I really appreciated my stand mixer (and its whisk attachment). You can use a hand mixer, but you lose some mobility while you’re mixing.
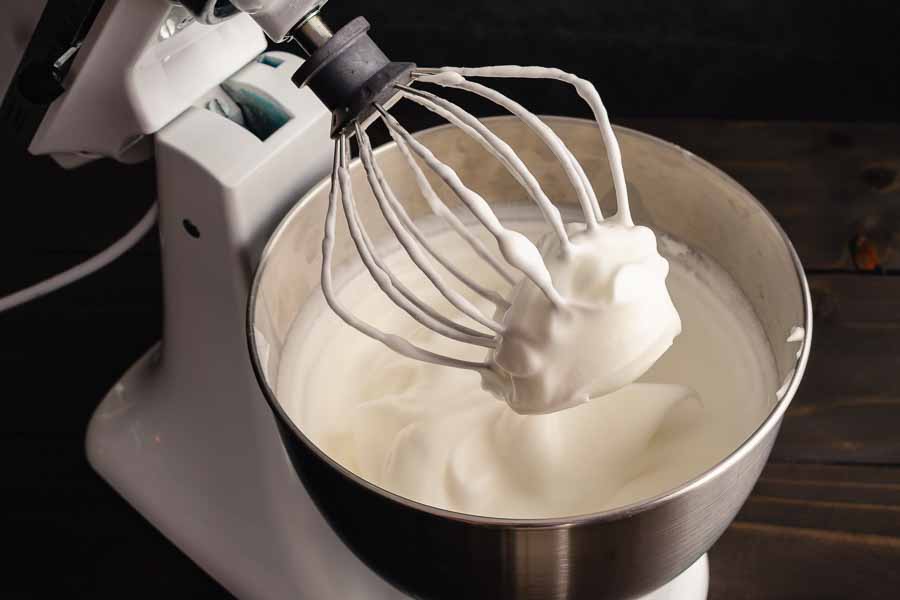
The egg whites had stiff peaks after 10 minutes, so I began folding in the sifted flour. I was so careful not to knock the air out of the egg whites that I didn’t mix it thoroughly enough.
I realized that when I found pockets of flour as I poured the batter into the pan. It wasn’t a problem to stop, return the bit of batter poured to the mixing bowl, and mix a little more to make sure there were no more pockets of unmixed flour.
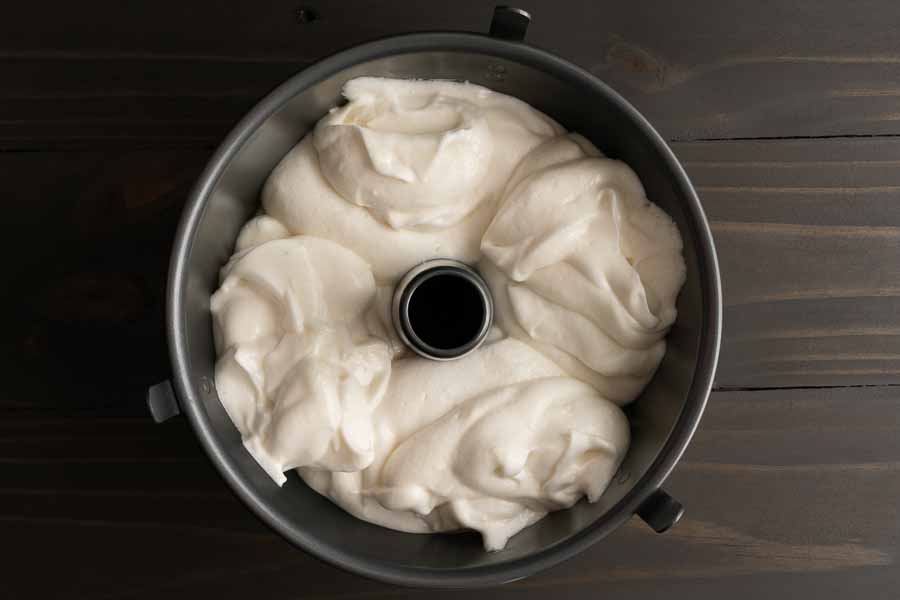
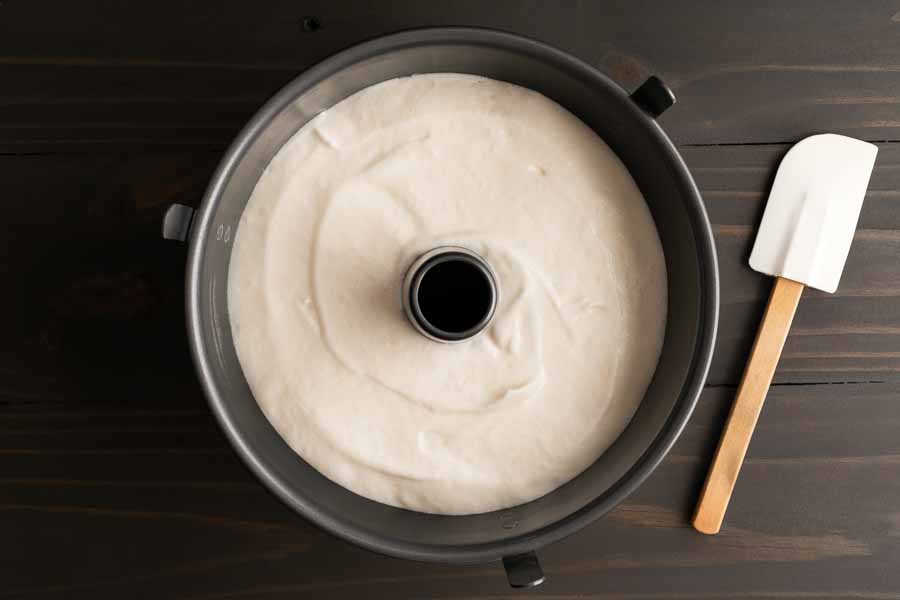
When I poured all the batter into the angel food cake pan, I noticed it held its shape. I had to use a silicone spatula to smooth it out. That wasn’t in the instructions, but I didn’t know if the batter would settle while it baked. A lumpy angel food cake was not my goal here!
Baking and Removal from the Pan
My angel food cake passed the toothpick test after 40 minutes in the oven. This is when not creating the pan came in handy. Let me explain.
The angel food cake pan I bought had three legs to stand on when inverted and a removable bottom. I did some practice pan flips with an empty pan, and the bottom fell. However, the baked cake stuck to the ungreased sides of the pan and held the bottom in place.
Flipping it was easy! I placed it on a wooden cutting board and left it to cool for an hour and a half. The cake didn’t move an inch.
Removing the cake from the pan was pretty easy too. First, I slid an offset spatula around the outer edges until the cake and center portion could be removed. Then I slid the same spatula around the center and bottom of the pan.
Another flip or two was needed to get things right. First, I put a plate on top of the cake while it still rested on the center part of the pan. Then I flipped it all and gently pulled the center of the pan loose.
Now the cake was completely out of the pan but it was upside down so one more flip was needed. I did it the same way: I put a plate on the upside-down cake and flipped it one last time. Now I had an angel food cake that was right-side up.
Timing
This recipe lists 15 minutes to prep, 40 minutes to cook, 1 hour additional time (cooling time), and 1 hour 55 minutes total. Here’s how my time was spent:
- 24 minutes to prep
- 40 minutes to cook/bake
- 1 hour 30 minutes to cool
- 3 minutes to remove from the pan
- 2 hours 37 minutes total
At first glance, it looks like I went way over the time listed. I did almost double the prep time, but I think there is more to it. That 1 hour of additional time seems like a typo because the instructions list 1.5 to 2.5 hours to cool.
If I adjust the additional time to the minimum cooling time of 1.5 hours, I get a total time of 2 hours 25 minutes. That is more in line with my results.