
I had a few blood oranges left over from the Winter Retreat Blood Orange Kale Salad I posted a while back. There was no way I was going to let them go to waste, so I went looking for another blood orange recipe and found this Blood Orange Cheesecake Tart. This beautiful pastry was made of blood orange curd layered over cheesecake, all inside a graham cracker crust. It looked and sounded too good to pass up! Plus it seems fair to make a blood orange dessert after making such a healthy salad.
Super creamy and balanced cheesecake topped with an easy tangy fresh blood orange curd, surrounded in a classic graham cracker crust!
The Ingredients
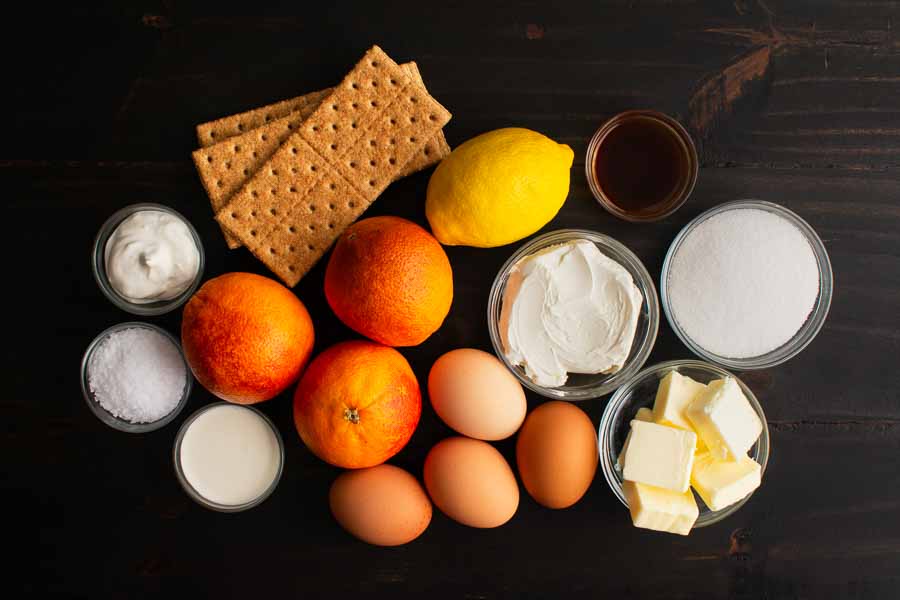
I only had a few ingredients on hand: granulated sugar, kosher salt, and vanilla extract. That left a seven-item shopping list. it was full of basic items like butter, cream cheese, etc. Nothing on that list was unusual, and I found everything at my usual grocery store.
The Process
The recipe divides the process into 3 major parts: graham cracker crust, cheesecake layer, and blood orange layer.
Making the Graham Cracker Crust
As with any tart, this recipe starts at the bottom with the graham cracker crust. While I love the taste, graham cracker crusts aren’t my favorite because they are very delicate and crumble easily.
The recipe doesn’t mention it, but the graham crackers needed to be pulverized into fine crumbs. To do that, I broke up 13 graham crackers so they would fit into my food processor. It had them ground into crumbs in a minute or two and gave me more than enough crumbs.
Next, the crumbs were mixed in a large bowl with the rest of the crust ingredients. The crust was made by pouring that mixture into a tart pan and pressing it into the sides and bottom.
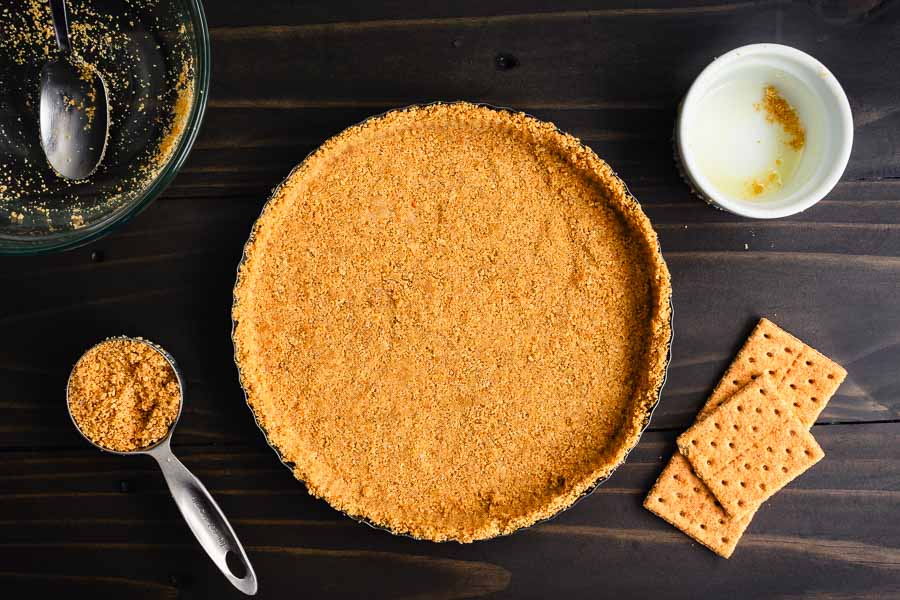
This recipe has a great tip about using a cup to press down the crust mixture. I used a combination of my fingers and a measuring cup with a flat bottom. A ramekin or drinking glass with a flat bottom would also work. Finally, the crust was baked for 10 minutes.
Tip: Moving a tart pan with a removable bottom is accident-prone—the removable bottom is easily dislodged! Pick up the pan by the sides only, and place the tart pan on a sheet pan before making the crust to eliminate that risk. Leave it on the sheet pan throughout the entire process, including cooling it in the refrigerator.
Making the Cheesecake Layer
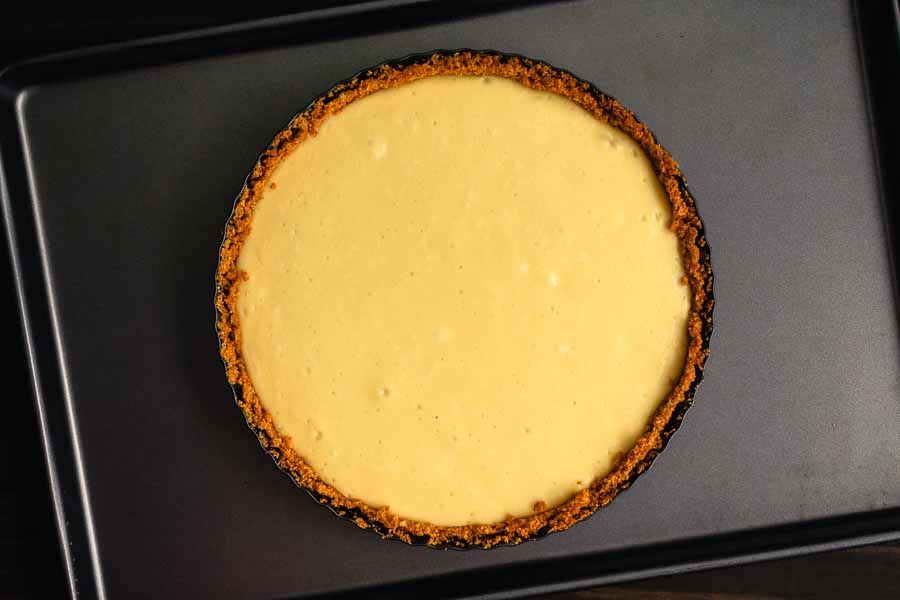
This was the easiest part of the recipe for me as it only took 10 minutes of active time. The ingredients were all mixed in my stand mixer, although a hand mixer would have worked too. The instructions were nice and clear and guided me through the process with no questions.
Once the filling was mixed up, I poured it into the cooled graham cracker crust that I left on the sheet pan it was baked on. Then it was back into the oven for 27 minutes followed by 30 more minutes of cooling in the oven once turned off.
I moved on to prepping and cooking the first batch of blood orange curd while the tart cooled in the oven. That involved some juicing, testing, and separating egg yolks, but I wanted all the ingredients ready to go before starting.
Making the Blood Orange Curd
I’ve made lemon curd before, but it’s been a while. All I remembered was it needs to be stirred constantly and cooked on low heat so it doesn’t turn into scrambled eggs. This recipe followed what I remembered, so I felt confident going into this part.
First, I added all the ingredients to a 1-quart saucepan and mixed until the sugar dissolved. Then I put it on the stove at heat level 1, added a thermometer, and started stirring with a silicone spatula. I kept stirring and stirring and stirring…
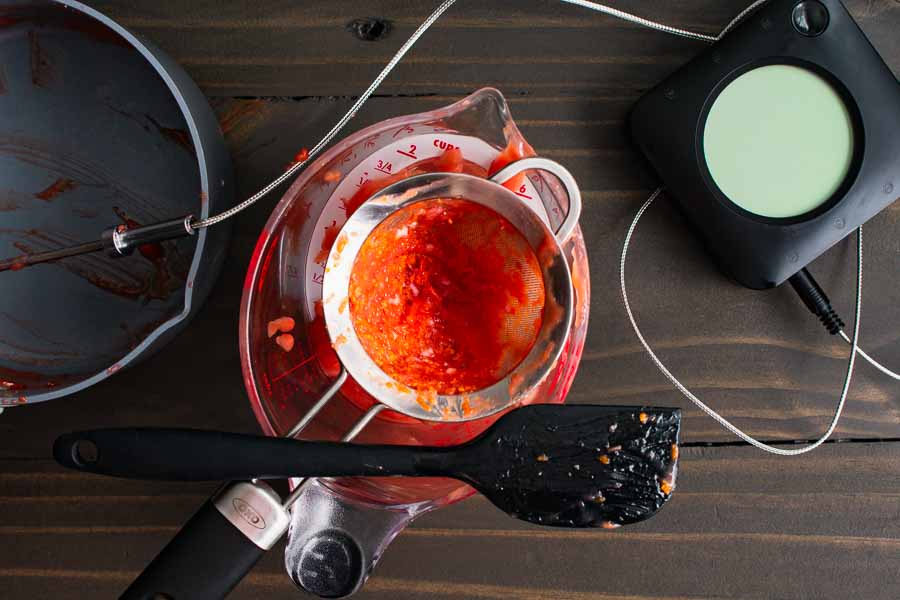
It took a lot longer than 10 minutes for the curd to thicken and come to 170°F. It took me 26 minutes (including stirring in the butter) plus another 6 minutes to strain it. The mixture was so thick I had to press it through the strainer with a small silicone spatula, and I ended up with 1/3 cup of blood orange curd.
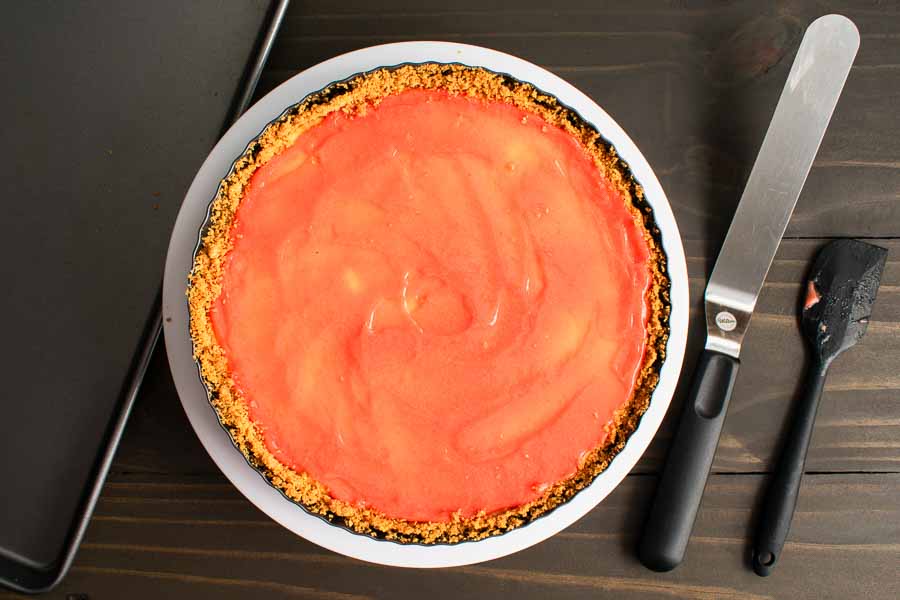
The curd was thick enough to spread curd over the surface of the cheesecake layer−think spreading mayo on bread for a sandwich. I tried and tried to spread it evenly, but there just wasn’t enough curd for an even coverage. I even moved it onto a rotating cake decorating stand.
The cheesecake layer still showed through in a few spots, and I wasn’t happy with that. I contemplated leaving it and covering the patches with decorations and ended up deciding to make a second batch of curd. I’m picky like that!
Making the Second Batch
This time I turned the heat up to 4, somewhere between medium-low and medium, and got to stirring. The mixture was much thinner than the first batch by the time it reached 170°F, and it only took 16 minutes to cook and strain it. And this batch yielded 1/2 cup of curd.
I didn’t let the second batch of curd cool too much and thicken up before I poured it over the tart. I began in the center and slowly moved outward, while slowly spinning the stand. This time there was enough to reach the edge. I was able to cover the whole tart by pouring on the curd, and it gave a very smooth finish.
There were a few tiny spots that didn’t reach the edge, but jiggling the pan took care of that. I also used a toothpick to fix a few dips. It broke the surface tension, and another jiggle smoothed out the dents. I was overjoyed!
I worked so hard to get that beautiful finish that I didn’t want to risk messing it up with foil. Instead, I moved the tart into my cake and cupcake carrier, slapped on the lid, and called it a day. I left the tart to set in the refrigerator overnight and decorated it the next day with leftover blood oranges and mint leaves.

Timing
This recipe lists 40 minutes to prep, 40 minutes to cook, 4 hours of resting time, and 5 hours 20 minutes total. Here’s how my time was spent:
- Graham Cracker Crust
- 10 minutes to prep the crust
- 10 minutes to bake the crust
- Cheesecake Filling
- 10 minutes to prep the cheesecake filling
- 27 minutes to bake the cheesecake filling
- Blood Orange Curd
- 9 minutes to prep the curd
- 26 minutes to cook the curd (1st batch)
- 7 minutes to apply the curd (1st batch)
- 16 minutes to make blood orange curd (2nd batch)
- 3 minutes to apply the curd (2nd batch)
- 4 hours to chill and set in the refrigerator*
- 5 hours 58 minutes total
The above does not include 30 minutes to cool the cheesecake layer in the oven or time to cool once removed from the oven. That was done while I prepped and made the first batch of blood orange curd.
*I used the minimum time listed in the recipe of 4 hours to chill and set for the time rating, but I let mine set up overnight.